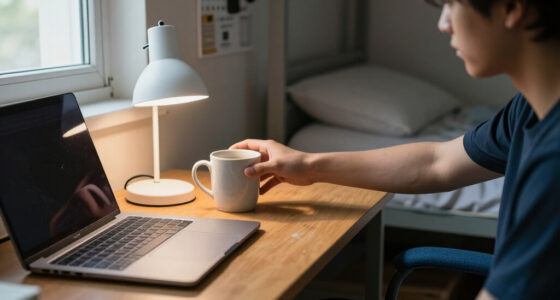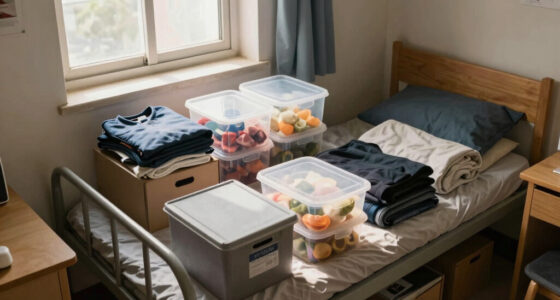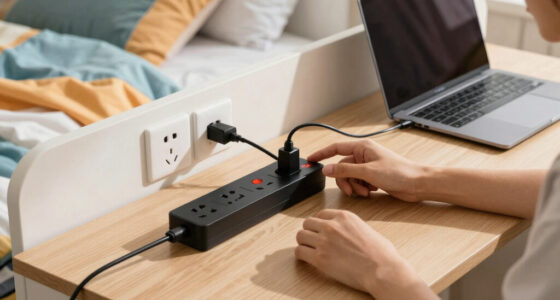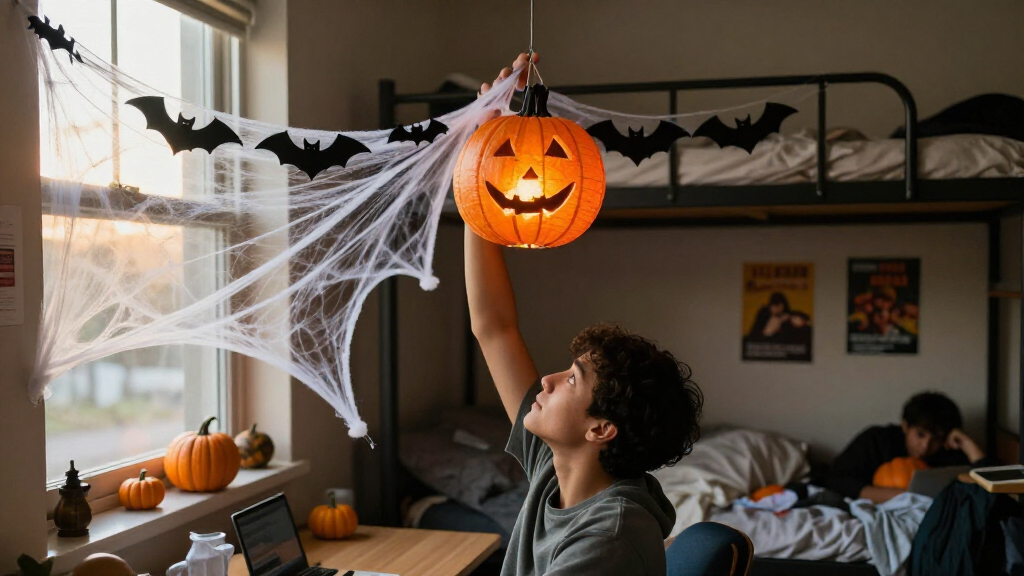
Turn your dorm room into a spooky Halloween space with removable decorations, safe lighting, and a layout that keeps doors and walkways clear. This guide is for students decorating a shared room for the first time or working with limited space, supplies, and permission to alter walls. Plan for about 1-2 hours, including a quick rules check and cleanup. By the end, your room should feel festive without damage, blocked exits, or open flames.

Prime made for students and young adults
- Fast, free delivery for dorm and study essentials
- Prime Video and Amazon Music included
- Member-only deals

DIYASY 120-Piece 3D Black Bat Halloween Wall Decor Stickers
- ✔ Quantity: 120 pieces
- ✔ Material: Waterproof PVC
- ✔ Color: Black

Dazzle Bright Halloween Fairy String Lights, 20 ft, 60 LED, Battery Operated, Purple and Orange
- ✔ Length: 20 feet
- ✔ LED count: 60
- ✔ Bulb spacing: 3.7 inches

12-Piece Halloween Bloody Handprint and Footprint Window Stickers
- ✔ Quantity: 12 pieces
- ✔ Material: Self-adhesive PVC
- ✔ Designs: Bloody handprints, footprints, and bloodstains
Difficulty: Beginner | Time: 1-2 hours
What You’ll Need
Tools & Materials:
- Removable painter’s tape or wall-safe adhesive hooks
- Scissors
- Measuring tape or ruler
- Battery-operated LED candles or string lights
- Lightweight paper decorations, such as bats, ghosts, or cobweb-style gauze
- A small trash bag for packaging and scraps
Knowledge:
- Basic use of removable adhesive products
- Awareness of shared-room boundaries and dorm safety rules
Set aside 1-2 hours. Choose lightweight decorations that can be removed cleanly, and check product packaging for wall compatibility and weight limits. Confirm dorm rules before decorating; many residences restrict candles, certain lighting, adhesives, ceiling coverings, or decorations near sprinklers. Ask your roommate before changing shared areas.
DIYASY 120-Piece 3D Black Bat Halloween Wall Decor Stickers
When we want the room to read as Halloween from across the doorway, DIYASY’s 120 black bat stickers offer the strongest starting point. The set includes four sizes, so we can arrange larger bats as focal points and smaller ones as a scattered flight. That makes the look more flexible than the bloody-print set, which is built around a specific horror scene, and more graphic than the softer glow of the Dazzle Bright lights.The main catch is that these are not simply peel-and-stick silhouettes. The pieces arrive flat and need to be manually shaped into 3D angles before application, adding time if we plan a dense arrangement. They also work best on smooth, dry, dust-free surfaces; textured dorm walls may undermine adhesion. The waterproof PVC broadens placement options to suitable windows or doors, and removal with heat is described as easy, but we should still check residence rules and test an inconspicuous spot before decorating.This is our top pick for students who want a room-defining Halloween display and have enough smooth surface to use it well. Compared with the lights, it gives a more unmistakably spooky silhouette; compared with the bloody decals, it can be arranged in a less graphic, more playful style. We would skip it if setup needs to be nearly instant or the only available wall is textured.
Pros:
- 120 pieces in four sizes support varied, room-wide arrangements.
- Raised 3D styling gives the display more dimension than flat silhouettes.
- Waterproof PVC allows use on suitable indoor or outdoor smooth surfaces.
- Can be removed with heat, according to the product description.
Cons:
- Each bat needs to be shaped by hand before application.
- Adhesion depends on a smooth, dry, clean surface.
- A large arrangement takes more planning and setup than hanging a light strand.
Best for: Students who want a customizable, high-coverage bat display on smooth walls, windows, or doors.
Not ideal for: Anyone with textured walls, very little setup time, or a preference for decorations that require no manual shaping.
Bottom line: We rank the DIYASY bats first for adaptable, high-coverage dorm decorating, provided the room has suitable smooth surfaces and we are willing to shape them.
“We rank the DIYASY bats first for adaptable, high-coverage dorm decorating, provided the room has suitable smooth surfaces and we are willing to shape them.”
Dazzle Bright Halloween Fairy String Lights, 20 ft, 60 LED, Battery Operated, Purple and Orange
Dazzle Bright’s purple-and-orange lights are the most adaptable choice when a dorm has limited wall space or we would rather not rely on adhesive. The 20-foot flexible copper wire can be shaped around a bed frame, desk, or window, while battery operation makes placement less dependent on finding an outlet. That is a practical advantage over both sticker sets, which need appropriate surfaces, though the lights create atmosphere rather than the unmistakable Halloween silhouettes the bats provide.Sixty LEDs, spaced about 3.7 inches apart, make this a decorative strand rather than a concentrated lamp. Its purple-and-orange color pairing establishes a seasonal mood without resorting to the bloody stickers’ more graphic look. The tradeoff is power management: three AA batteries are required, and the battery case is not waterproof. The strand is rated IP44, but we should keep the case dry and avoid treating the entire setup as weatherproof.We place it second because it is useful in compact rooms and can be rearranged more easily than wall decals, but it may need another decoration to deliver a strongly spooky focal point. Compared with the DIYASY bats, it is quicker to position but less visually sculptural. Compared with the bloody prints, it is less startling and more suited to a festive, atmospheric dorm. Choose it when placement flexibility matters most; skip it if we want a no-battery setup or an intense haunted-house scene.
Pros:
- Twenty-foot flexible wire can be shaped around furniture and room features.
- Battery operation supports placement away from a wall outlet.
- Purple and orange LEDs create a clear seasonal color scheme.
- Suitable for indoor or outdoor decorating when the battery case is kept dry.
Cons:
- Requires three AA batteries, which are not specified as included.
- The battery case is not waterproof.
- Atmospheric lighting is less visually spooky on its own than bats or bloody prints.
Best for: Students who want colored Halloween ambience and flexible placement around furniture or windows without a nearby outlet.
Not ideal for: Anyone who wants a dramatic wall centerpiece, does not want to supply AA batteries, or needs a fully weatherproof outdoor setup.
Bottom line: We recommend these lights for flexible, colorful dorm ambience, but not as a substitute for a more graphic Halloween centerpiece.
“We recommend these lights for flexible, colorful dorm ambience, but not as a substitute for a more graphic Halloween centerpiece.”
12-Piece Halloween Bloody Handprint and Footprint Window Stickers
If we want one window or door to look like the scene of a Halloween escape, the bloody handprint and footprint stickers create that story more directly than either of the other picks. The set combines handprints, footprints, and bloodstains, with high-definition printing intended to look vivid. Unlike the bat set’s broad, atmospheric pattern, these decals make a small area the center of attention; that focused effect can suit a dorm entrance or window without filling every wall.The pack includes plastic scraper tools to help with application, and the PVC stickers are described as removable without residue. Still, a clean removal claim does not remove the need to consider dorm rules or test the surface first. Adhesion may vary with texture, so the set makes more sense on glass or other compatible smooth surfaces than on a rough wall. The theme is also intentionally graphic and seasonal: it has less styling flexibility than the bats and lacks the ongoing light and color of the Dazzle Bright strand.We rank it third because its impact is specific rather than all-purpose, not because it cannot make a room feel spooky. Compared with the bat decals, it is a more literal scare and requires fewer pieces to define a focal point. Compared with the lights, it is more dramatic but less adaptable to different moods. Choose it for a deliberate haunted-house accent; skip it if we prefer a playful look, need decorations for use beyond Halloween, or want to cover a larger area.
Pros:
- Handprints, footprints, and stains create a distinct haunted-house scene.
- High-definition printing aims for a vivid, lifelike effect.
- Plastic scraper tools are included to help with installation.
- Designed to remove cleanly without residue.
Cons:
- The graphic look is less versatile than bats or colored lights.
- Adhesion may vary depending on surface texture.
- A 12-piece set is better suited to a focal area than extensive coverage.
Best for: Students who want a vivid, horror-themed accent on a suitable window, door, or smooth wall.
Not ideal for: Anyone who prefers subtle or playful decor, needs broad room coverage, or has surfaces with unreliable adhesion.
Bottom line: We would choose these stickers for one bold horror accent, while choosing the bats for broader coverage or lights for a less graphic atmosphere.
“We would choose these stickers for one bold horror accent, while choosing the bats for broader coverage or lights for a less graphic atmosphere.”
As an Amazon Associate we earn from qualifying purchases.
Before You Start
Keep all exits, door swings, heaters, vents, smoke detectors, sprinklers, and electrical panels uncovered and reachable. Do not use real candles, incense, flammable sprays, or materials that hang from or cover fire-safety equipment. Avoid placing decorations where they can fall onto a bed, computer, or walking path. If a rule is unclear, contact residence staff rather than guessing.
Pick a small color palette—such as black, orange, and white—so a few coordinated decorations look intentional. Decide whether the room will have a playful ghost theme, a haunted-house look, or a simple autumn mood. In a shared room, agree on which surfaces are yours before attaching anything.
Step-by-Step Instructions
Read your residence’s decoration and fire-safety rules. Check restrictions on lights, adhesives, fabric, ceiling decorations, and door displays. Ask your roommate which shared surfaces you can decorate, and agree on a theme and color palette. If you cannot confirm whether an item is allowed, leave it out until staff clarifies the rule.
Tip: Do not assume that a product is allowed just because it is battery-operated or labeled removable. Dorm rules can set limits on both materials and placement.
Check: You know which decorations and attachment methods are allowed, and your roommate has approved the shared areas you plan to use.
Step 2: Clear and measure the decorating area
Remove loose items from the surfaces you plan to decorate. Measure the usable wall, desk, shelf, or window area, then sketch a quick layout on paper or in your phone. Mark the door swing, walkway, vents, heaters, outlets, smoke detector, and sprinkler locations as no-decoration zones. Keep decorations within your assigned side or agreed shared area.
Tip: Leave extra room around the door and desk so decorations do not snag backpacks, chairs, or bedding during normal use.
Check: Your layout shows decoration zones and clear paths, with all safety equipment and room controls unobstructed.
Step 3: Sort materials and test the attachment method
Lay out your decorations and remove anything heavy, sharp, strongly scented, or likely to shed glitter. Test one piece of painter’s tape or a wall-safe hook in a discreet spot, following its package directions. Wait for the stated test period if the product calls for one, then remove it gently and inspect the surface. Do not apply adhesive to a surface the product excludes.
Tip: Adhesive performance varies by paint, texture, humidity, and surface condition. A small test can prevent peeling paint or a decoration that drops overnight.
Check: The test decoration stays attached as intended, and removal does not mark or lift the test area.
Step 4: Add the main spooky backdrop
Start with one large, lightweight focal point on an approved wall or window, such as paper silhouettes, a paper moon, or a ghost cutout. Attach it with the tested method and keep it clear of vents, heaters, door hardware, and safety devices. Step back from the doorway to check that the focal point is visible without filling every available surface.
Tip: Use paper shapes or a small piece of lightweight gauze rather than covering a whole wall with fabric. Large fabric panels can create fire and ventilation concerns.
Check: The main decoration is secure, visible from the room entrance, and outside all restricted zones.
Step 5: Build the theme with smaller accents
Arrange a few smaller decorations around the focal point: paper bats, a small pumpkin, a themed pillow cover, or a tabletop prop. Group related items instead of scattering them across every surface. Keep the desk work area, bed access, shelves, and roommate’s belongings usable. Place small objects where they cannot be knocked onto the floor or a walkway.
Tip: A handful of coordinated pieces usually looks cleaner than a crowded collection. Leave some empty space so the room remains comfortable to use.
Check: The decorations read as one theme, while the desk, bed, storage, and shared areas remain practical.
Step 6: Set up safe Halloween lighting
Use battery-operated LED candles or approved LED string lights to add a dim glow. Follow the product instructions, use only the included battery type, and keep lights away from bedding, paper piles, and fabric. Route any permitted cord along an edge where nobody will step on it, and do not run it beneath a rug or across an exit path. Turn lights off when leaving if the product or dorm rules require it.
Tip: Never substitute a real candle, lighter, or incense burner. Do not connect more lights than the product instructions or dorm rules allow.
Check: Lights turn on and off correctly, stay cool during a short test, and do not create a trip hazard or cover safety equipment.
Step 7: Check the room from several viewpoints
Stand at the doorway, sit at your desk, and walk from the bed to the exit. Look for decorations that block sightlines, snag clothing, fall when the door moves, or interfere with daily tasks. Ask your roommate to review the shared areas. Reposition or remove anything that feels unstable, crowded, or intrusive.
Tip: Check after closing and opening the door, pulling out the desk chair, and making the bed. These movements reveal snags that a still-room inspection can miss.
Check: You can enter, leave, work, sleep, and reach room controls without moving decorations or stepping around cords and props.
Step 8: Save removal notes and clean up
Keep any spare adhesive, product instructions, and a photo of the finished layout together. Collect packaging and paper scraps, then put unused supplies away. If you used adhesive, note how the manufacturer says to remove it and plan to take it down before checkout or whenever housing rules require it.
Tip: Do not pull adhesive tabs straight outward if the product directs you to stretch them down along the wall. Follow the package removal method to reduce paint damage.
Check: The floor and work surfaces are clear, and you know how to remove each decoration without leaving materials behind.
Common Mistakes to Avoid
- Covering a large area with cloth, paper, or cobweb material. — Use a few small, lightweight accents and keep all fire-safety equipment, vents, and heaters clear. Check residence rules before adding fabric or ceiling decorations.
- Applying tape or hooks without checking the wall surface. — Test the exact product in a discreet area first, follow its weight and surface limits, and avoid damaged or textured surfaces when the product excludes them.
- Using real candles or routing a light cord across a walkway. — Choose battery-operated LED lighting and keep cords, batteries, and decorations away from paths, bedding, and heat sources.
- Decorating shared surfaces without checking with a roommate. — Agree on the theme, surfaces, and lighting before installation; keep decorations on your own side when there is no agreement.
Troubleshooting
Problem: A decoration will not stay attached.
Solution: Take it down and check that the surface is clean, dry, and allowed for that adhesive. Try a lighter decoration or an approved freestanding display. Do not add stronger tape or nails unless housing rules permit them.
Problem: The adhesive pulls paint or leaves residue.
Solution: Stop removing it and follow the product’s removal instructions. For residue, use only a cleaning method approved for the wall finish; ask residence staff before applying solvents or scraping.
Problem: The room looks cluttered after decorating.
Solution: Remove duplicate accents and keep one focal point with a few supporting pieces. Clear the desk and walking path first, then reassess from the doorway.
Problem: Lights flicker, feel warm, or do not turn on.
Solution: Switch them off. Check the battery orientation and product instructions, replace batteries only with the specified type, and stop using lights that remain warm, damaged, or unreliable. Ask housing staff about approved replacements.
What Success Looks Like
Your room has a recognizable Halloween theme built around a clear focal point, with a few coordinated accents and safe LED lighting. Decorations stay attached during ordinary room use, do not damage surfaces, and leave the door, walkways, vents, heaters, outlets, smoke detector, sprinkler, and roommate’s area accessible. The room remains comfortable for sleeping and studying, and you know how to remove every item cleanly.
Next Steps
Check the decorations after the first night and after moving furniture; retighten or remove anything loose. Switch off lights when required by product directions or dorm policy, and replace batteries only as directed. Before the end of the season or checkout, remove decorations using each product’s stated method, collect every piece of tape and paper, and check walls and floors for residue or scraps. Report any damage to residence staff rather than attempting an unapproved repair.
Frequently Asked Questions
How can I decorate a dorm room without damaging the walls?
Use lightweight decorations and an adhesive product approved for your wall surface. Test it in a discreet place, follow the weight limit, and remove it using the manufacturer’s method. If the wall is textured, damaged, or excluded by the product instructions, use freestanding decorations instead.
Can I use Halloween string lights in my dorm?
Check your residence policy and the light manufacturer’s instructions before use. Choose approved LED lights, keep them away from fabric and paper, avoid overloaded outlets, and prevent cords from crossing paths. Battery-powered lights may still be restricted by some housing policies.
What are good Halloween decorations for a very small dorm room?
Choose one wall or window focal point, a few flat paper cutouts, and one or two small desk or shelf accents. Use vertical space only where allowed, and leave the bed, desk, storage, and path to the door clear.
Can I hang decorations from the ceiling or over the door?
Only if residence rules expressly allow it and the placement does not block sprinklers, smoke detectors, door hardware, or an exit route. Do not use ceiling hooks or adhesives without permission. A wall or freestanding display is a safer alternative.
Keep the theme on your own side of the room and ask before using shared windows, doors, desks, or lights. You can make your area festive with a small wall display and a few personal items without changing the shared space.
Halloween Picks
halloween
As an affiliate, we earn on qualifying purchases.