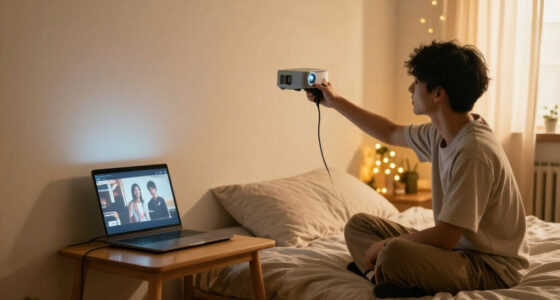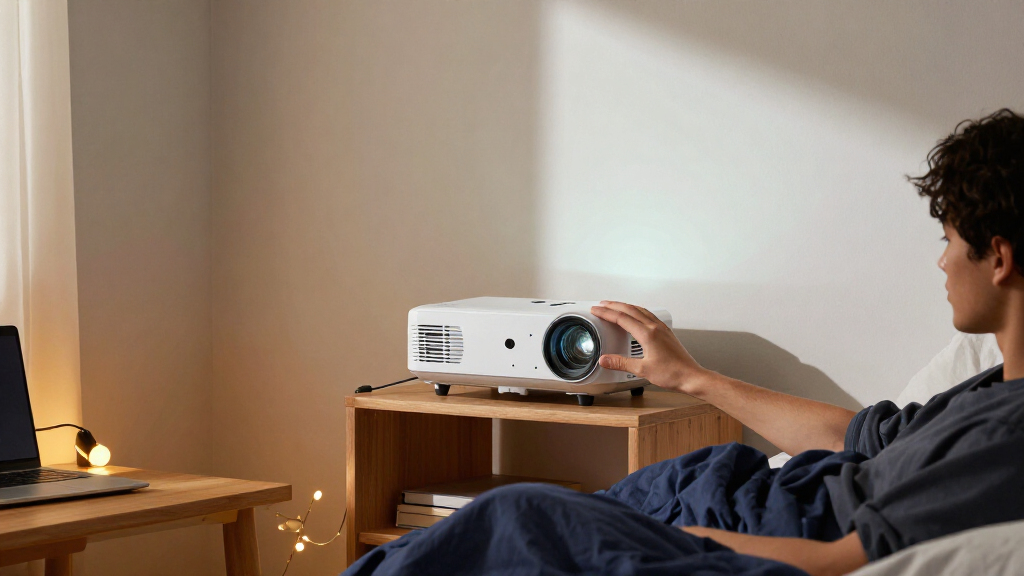

Choose a compact mini projector for your dorm, set it up safely in a small room, and test the picture and sound before movie night. This guide is for students who want a flexible screen for films, shows, games, or presentations without buying a full-size television. It takes about 1–2 hours, including product research and a basic setup. You do not need technical experience; you will need to check the room, compare projector specifications, and confirm that the model fits your budget and campus rules.

Prime made for students and young adults
- Fast, free delivery for dorm and study essentials
- Prime Video and Amazon Music included
- Member-only deals

YGSKK Mini Projector with Wi-Fi 6, Bluetooth 5.3, Built-in Apps, Native 1080P, Electric Focus, and 210° Rotating Stand
- ✔ Native resolution: 1080P
- ✔ Brightness: 300 ANSI lumens
- ✔ Projection size: 50–200 inches

HY300Pro Mini Projector with Android 14, WiFi 6, Bluetooth 5.4, and 4K Support
- ✔ Native resolution: 1280 × 720 (720P)
- ✔ Maximum supported resolution: 3840 × 2160 (4K decoding)
- ✔ Brightness: 200 ANSI lumens

Magcubic HY300Pro Mini Projector with WiFi 6, Bluetooth 5.4, 4K Support, Auto Keystone, and 180° Rotation
- ✔ Model: HY300Pro
- ✔ Native resolution: Not specified
- ✔ Resolution support: 4K supported; native output not stated
Difficulty: Beginner | Time: 1–2 hours for research, setup, and testing
What You’ll Need
Tools & Materials:
- Tape measure or measuring app
- Phone or laptop with the content or streaming services you plan to use
- Power outlet and any required HDMI, USB-C, or streaming adapter
- Stable shelf, desk, or tripod that can safely support the projector
- Notebook or notes app for comparing models
Knowledge:
- Basic familiarity with your phone, laptop, and streaming services
- Ability to check your dorm’s rules for electronics and mounting equipment
Set a spending limit that includes any cables, adapter, screen, stand, or external speaker you may need. Check whether your dorm allows projectors, wall mounting, or lights-out use. A plain, light-colored wall can work as a screen, but a smooth surface usually gives a clearer image.
YGSKK Mini Projector with Wi-Fi 6, Bluetooth 5.3, Built-in Apps, Native 1080P, Electric Focus, and 210° Rotating Stand
The YGSKK is our best overall pick because it combines native 1080P with electric focus and a rotating stand. In a dorm, the sharper native image helps text, subtitles, and interface details remain more legible than on the 720P HY300Pro. Electric focus also removes one small but recurring setup chore when moving the projector between a desk, shelf, or ceiling-facing position.Its 300 ANSI lumens are higher than the 200 ANSI lumens listed for both HY300Pro models, giving it a modest advantage when the room is not perfectly dark. That is a relative edge, not a promise of daytime visibility: we would still plan to dim lights and close curtains. Built-in apps for Prime Video, YouTube, and Hulu can reduce the need to pack a streaming stick, while Wi-Fi 6 and Bluetooth 5.3 cover wireless networking and audio-device pairing.The compromises are practical. The listing says Bluetooth is for audio devices and does not support smartphone mirroring; Android phone mirroring requires a specific app. And although it accepts 4K sources, the native display is 1080P. Compared with the HY300Pro picks, it is the easier projector to focus and the better-specified choice for image detail, but buyers prioritizing the lightest stated weight or ceiling-friendly 180-degree positioning may prefer Magcubic or the Android 14 model.
Pros:
- Native 1080P is the highest clearly stated native resolution in this lineup.
- Electric focus makes repositioning easier than manual focusing.
- 300 ANSI lumens is higher than the 200 ANSI lumens listed for both HY300Pro models.
- Built-in apps and a 210° rotating stand support flexible dorm setups.
Cons:
- 4K sources are compatible, but output is not native 4K.
- Bluetooth is limited to audio devices; phone mirroring has extra requirements.
- Its 300 ANSI lumens still favors dim or dark rooms.
Best for: Dorm residents who want sharper native resolution, built-in streaming apps, and less manual setup when repositioning the projector.
Not ideal for: Anyone expecting native 4K, straightforward phone mirroring, or a bright picture with the lights on.
Bottom line: Choose the YGSKK when native 1080P and electric focus matter more than having the smallest stated weight or a 180-degree lens.
“Choose the YGSKK when native 1080P and electric focus matter more than having the smallest stated weight or a 180-degree lens.”
HY300Pro Mini Projector with Android 14, WiFi 6, Bluetooth 5.4, and 4K Support
This HY300Pro is the dorm pick for flexible placement. Its 0.9:1 throw ratio and stated 0.75m to 2.65m distance range are suited to rooms where we cannot place a projector far across the space. The 180-degree rotatable lens also makes ceiling projection an option for late-night viewing from bed, a useful distinction from the YGSKK’s 210-degree rotating stand, which is described as a stand rather than a rotating lens.Pure Android 14 gives this model a more self-contained setup than the Magcubic listing, which does not specify its operating system or app catalog. Built-in streaming access, Wi-Fi 6, Bluetooth 5.4, and a 5W speaker can keep the basic kit compact. At 0.77 pounds, it is easy to move or store between uses. The short throw and built-in system are especially appealing when a dorm room has little spare furniture for a streaming box and speaker.The central compromise is native 720P resolution. It can decode 4K content, but that does not make its output 4K; compared with the YGSKK’s native 1080P, fine detail and small text are less compelling. Its 200 ANSI lumens also make darkness important, and manual focus means a little more adjustment when moving it. We would choose it for convenient placement and ceiling viewing, not for the crispest picture in this group.
Pros:
- 0.9:1 throw ratio supports a large image from a relatively short distance.
- 180-degree rotatable lens enables wall or ceiling projection.
- Android 14 and built-in streaming can reduce the need for separate devices.
- Lightweight 0.77-pound design and built-in 5W speaker keep setup portable.
Cons:
- Native resolution is 720P, below the YGSKK’s native 1080P.
- 200 ANSI lumens is best suited to a dark room.
- Manual focus takes more effort than the YGSKK’s electric focus.
Best for: Students with tight placement constraints who want built-in Android streaming and the option to project onto a ceiling.
Not ideal for: Viewers who prioritize native 1080P detail, bright-room use, or quick electric focus.
Bottom line: Pick this HY300Pro when short-throw placement, Android streaming, and ceiling projection outweigh the lower native resolution.
“Pick this HY300Pro when short-throw placement, Android streaming, and ceiling projection outweigh the lower native resolution.”
Magcubic HY300Pro Mini Projector with WiFi 6, Bluetooth 5.4, 4K Support, Auto Keystone, and 180° Rotation
Magcubic is the portability specialist in this comparison. Its stated 350g weight matches the 0.77-pound figure for the Android 14 HY300Pro, so it is easy to carry between a dorm room and a study space. The useful difference is auto keystone: it can help square the image when the projector is set down at an angle, reducing fuss in rooms where a perfectly centered shelf is not available.Like the other HY300Pro, it rotates 180 degrees for wall or ceiling projection and lists Wi-Fi 6 and Bluetooth 5.4. The YGSKK offers higher stated brightness and native 1080P, so it is the more convincing option for detail and slightly less controlled lighting. Magcubic instead emphasizes simple movement and flexible angles. Its 50,000-hour light-source lifespan is also specified, though that does not change the image-quality tradeoff for everyday dorm use.We have less certainty about what this model displays and runs: the listing says it supports 4K but does not state native resolution, and it does not name a built-in app catalog. That makes it harder to compare directly with the Android 14 model’s explicitly described system. At 200 ANSI lumens, it shares the same dark-room limitation. Manual system updates may also be needed to keep built-in applications compatible. Choose it when compactness and auto keystone matter most, and confirm the streaming setup you need before relying on its apps.
Pros:
- At 350g, it is a lightweight option for moving between spaces.
- Auto keystone can simplify angled placement in cramped rooms.
- 180-degree rotation supports ceiling and wall projection.
- Wi-Fi 6 and Bluetooth 5.4 provide wireless connectivity.
Cons:
- Native resolution is not specified; 4K support does not establish native 4K output.
- 200 ANSI lumens limits use in well-lit rooms.
- Manual system updates may be needed for built-in app compatibility.
Best for: Students who carry a projector between rooms and value auto keystone and flexible ceiling or wall positioning.
Not ideal for: Buyers who need a clearly stated native resolution, a specified streaming app lineup, or stronger brightness.
Bottom line: Choose Magcubic for a lightweight, angle-flexible setup, provided its unspecified native resolution and app details meet your needs.
“Choose Magcubic for a lightweight, angle-flexible setup, provided its unspecified native resolution and app details meet your needs.”
As an Amazon Associate we earn from qualifying purchases.
Before You Start
Measure the distance from the likely projector position to the wall or screen and note the usable wall width. Check where the nearest outlet is and whether a bed, desk, or roommate’s belongings will block the image. Dorm rooms vary, so do not assume a projector will produce a large, sharp picture from a short distance.
Compare specifications using the projector’s stated resolution and brightness, and check independent reviews for real-world performance. Resolution describes image detail; native resolution is the projector’s actual display resolution. A device that accepts a higher-resolution signal may still display a lower-resolution image. Brightness numbers can be measured differently across manufacturers, so compare models cautiously and plan to darken the room when possible.
Step-by-Step Instructions
Step 1: Measure the viewing area
Choose the wall or screen you expect to use and measure its available width. Measure the distance from a stable projector position to that surface, then note obstacles such as shelves, lamps, doors, and the ceiling fan. Check whether you can darken the room with curtains or blinds without breaking dorm rules.
Tip: If you share the room, agree on a placement that does not shine across your roommate’s bed or block their desk.
Check: You have a usable wall width, a projector-to-wall distance, and at least one safe location for the device and power cable.
Step 2: Choose your main use
Decide whether you will mainly watch films and shows, play games, or display presentations. For films and shows, prioritize a clear image at the size and distance your room supports. For gaming, check input lag in reviews and confirm that your console or computer can connect. For presentations, check the ports and whether text stays readable at the intended image size.
Tip: If the projector will serve several purposes, list the features you need first and treat extras such as built-in streaming apps as optional.
Check: Your notes name your main use and the features that matter most for it.
Step 3: Set a complete budget
Set a maximum price for the entire setup, not just the projector. Add the cost of any required adapter, HDMI cable, stand, screen, carrying case, or speaker. Keep a little room for an item you discover is necessary after checking the projector’s ports and placement options.
Tip: Check the return policy and warranty before buying, especially if you cannot test the projector in your room before the return window begins.
Check: You have a total spending limit and know which accessories are included and which would cost extra.
Step 4: Compare image and placement specifications
Shortlist a few models and check their native resolution, brightness, throw ratio or recommended projection distance, focus adjustment, and keystone correction. Use the manufacturer’s placement guidance to estimate whether each model can fill your measured wall area. Look for reviews that test the image in a dim room and describe sharpness, fan noise, and ease of focus.
Tip: Keystone correction can straighten a skewed image, but heavy correction may reduce usable image detail. A straight-on position usually gives a better picture.
Check: At least one shortlisted model can produce an image size that fits your wall from a safe location, according to its placement guidance.
Step 5: Check connections and sound
Confirm that the projector can connect to your chosen source. Check for HDMI, compatible USB-C video input, wireless casting support, or built-in apps, and verify whether you need an adapter. Read the app and operating-system compatibility details before relying on wireless streaming. Check speaker reviews too; small built-in speakers may not sound clear over a fan or room noise.
Tip: Streaming services can restrict casting or playback from some phones and projectors. Confirm your intended service works before you buy, or plan to connect a supported streaming device by HDMI.
Check: You know exactly how your phone, laptop, console, or streaming device will connect, and whether you need separate audio.
Step 6: Select a dorm-friendly model
Compare the shortlisted models against your measurements, use, total budget, connection needs, and return policy. Check the projector’s dimensions and weight, ventilation requirements, power supply, and operating noise in reviews. Choose the smallest model that still meets your image and connection needs; a smaller body alone does not guarantee a suitable picture.
Tip: Avoid placing the projector where bedding, clothing, or a wall can cover its ventilation openings.
Check: Your chosen model fits your planned location, works with your source device, and stays within your complete setup budget.
Step 7: Prepare the room and place the projector
After the projector arrives, read its setup and safety instructions. Put it on a stable, level surface with ventilation space around the openings. Aim it toward the wall or screen from as straight-on a position as possible. Route the power and signal cables where no one will trip over them, and keep them clear of hot surfaces and walkways.
Tip: Do not suspend the projector from a wall, ceiling, or shelf unless the manufacturer allows that mounting method and your dorm permits it.
Check: The projector stands securely, has open ventilation, and its cables do not cross a walking path.
Step 8: Connect and adjust the image
Connect your source using the confirmed cable, adapter, or supported wireless method. Turn on the projector and select the correct input. Use the focus control to sharpen the image, then move the projector or adjust its zoom to fit the wall. Use keystone correction only as needed to square the image, and adjust brightness or picture settings for the room.
Tip: If the image looks soft, clean the lens only as the manual directs and check focus across the center and edges. A very large image may exceed the projector’s practical sharpness or brightness.
Check: The image fills the intended area, looks focused from your usual seat, and has readable detail in the content you plan to watch.
Step 9: Test sound and a full viewing session
Play a short film, show, game, or presentation from the device you plan to use most. Set the volume to a level that works in your room, and connect a speaker or headphones if the built-in audio is too quiet or thin. Listen for fan noise during a quiet scene and check that the device does not overheat or lose its connection during use.
Tip: Agree on quiet hours and volume expectations with your roommate before using external speakers late in the evening.
Check: Your source plays without interruptions, the image remains focused, sound is audible at an appropriate level, and the projector’s ventilation stays unobstructed.
Common Mistakes to Avoid
- Buying based on a large advertised image size without checking projection distance. — Measure your room first and compare the model’s placement guidance with the distance you actually have.
- Assuming a projector’s supported input resolution is its native display resolution. — Check the native resolution in the specifications and confirm picture detail in independent reviews.
- Expecting a bright image in a lit room from a small projector. — Read real-world brightness reviews, reduce ambient light where permitted, and use a modest image size.
- Forgetting connection costs or assuming every streaming app will work. — Check ports, device compatibility, and app or casting restrictions, then include needed cables and adapters in your budget.
Troubleshooting
Problem: The image looks blurry or text is hard to read.
Solution: Adjust focus, make sure the projector is stable and aimed straight at the surface, and reduce the image size if needed. Check that the wall or screen is flat and clean.
Problem: The image is trapezoid-shaped or does not fit the wall.
Solution: Reposition the projector closer to a straight-on angle and adjust its distance or zoom. Use keystone correction sparingly, then focus again.
Problem: The projector shows no picture from a laptop or console.
Solution: Select the matching input, check that the cable and adapter support video, and confirm the source device is set to output to an external display. Try a known working cable or supported connection.
Problem: The picture is washed out or the built-in sound is difficult to hear.
Solution: Darken the room, reduce the projected image size, and check picture settings. For sound, lower competing room noise or connect a compatible speaker or headphones.
What Success Looks Like
Your setup is ready when the projector sits securely with clear ventilation, connects reliably to your chosen source, and displays a focused image that fits the available wall or screen. You can hear the content at a room-appropriate level, cables stay out of the walkway, and the projector runs through a full viewing session without losing focus or connection.
Next Steps
Save the cables and adapters with the projector so they are easy to find, and store the device in its case when it is cool and unplugged. Recheck focus and cable placement if you move it. Clean the lens and air openings only as the manual directs. If your room, source device, or viewing needs change, repeat the distance and compatibility checks before buying accessories.
Frequently Asked Questions
Can a mini projector work in a dorm room?
Yes, if you have a suitable projection surface, enough distance for the image size you want, and a safe location with power and ventilation. Results depend on the model and room lighting, so check placement guidance and real-world reviews.
Do I need to buy a projector screen?
No. A smooth, light-colored wall may work for casual viewing. A screen can improve consistency if your wall is textured, uneven, or dark, but check its size and mounting rules before buying one.
Will a mini projector replace a dorm television?
It can serve as a flexible display for films, shows, games, or presentations, but picture brightness, built-in sound, setup time, and room lighting may differ from a television. Test your typical viewing setup before deciding whether it meets your needs.
Can I stream from my phone?
That depends on the projector, phone, streaming service, and connection method. Check supported casting and app details; some services restrict wireless playback. A compatible streaming device connected by HDMI may be a more predictable option.
How do I keep the projector quiet in a shared room?
Check reviews for fan noise, place the projector on a stable surface away from beds, and keep its vents clear. Use headphones or agree on speaker volume and viewing hours with your roommate.