
TL;DR
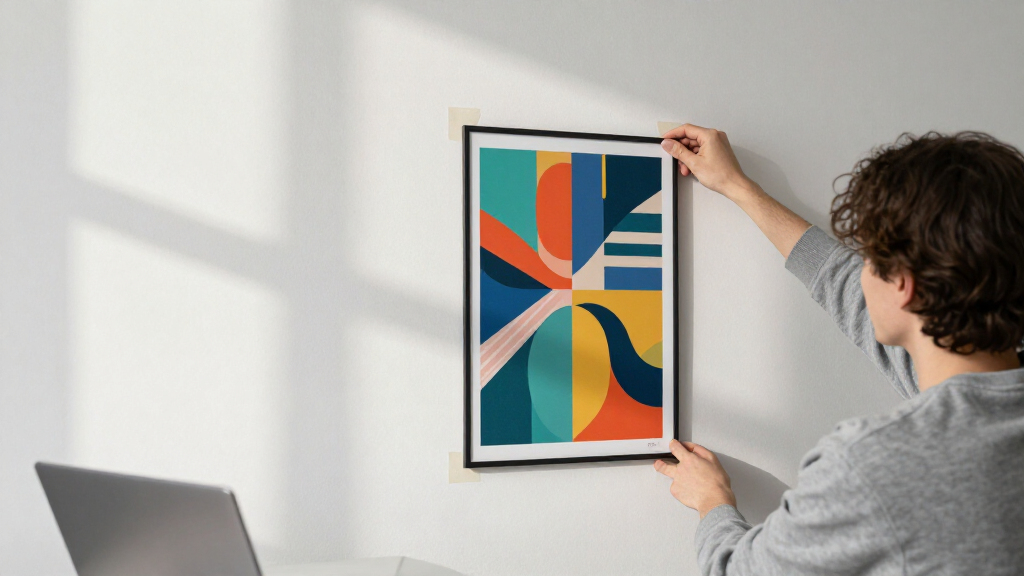
You can hang wall art in your dorm without damaging walls by choosing the right adhesives and techniques. Command strips, putty, and creative alternatives help keep walls pristine and avoid damage fees.
Imagine transforming your sterile dorm room into a cozy, personalized space — without the fear of damaging walls or facing damage charges at checkout. The trick is choosing the right methods to hang your art. You want your space to reflect your style, but dorm wall rules and fragile surfaces mean you need damage-free solutions.
This guide walks you through smart strategies, from trusted adhesive hooks to creative alternatives, so you can decorate confidently without risking costly repairs or rule violations.
Always prep walls with isopropyl alcohol before applying adhesives to ensure strong, damage-free hold.
Respect weight ratings and surface types; textured walls need specialized solutions.
Use reusables like tension rods and picture rails for heavy or large art, avoiding adhesives altogether.
Check your dorm’s rules before hanging anything — some decorations are outright banned.
Proper removal techniques, like pulling strips straight down, prevent paint peeling.
Dorm Decor Field Guide · Damage-Free Hanging
How to Hang Wall Art Without Damaging Dorm Walls
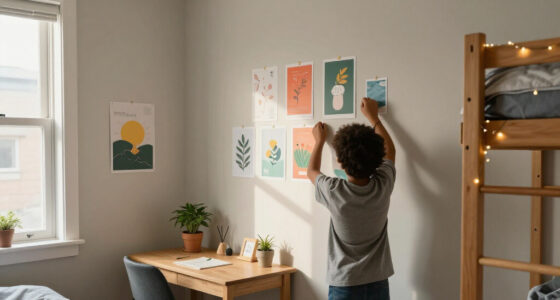
Turn a sterile dorm room into a space that feels like yours — without nails, peeled paint, or a checkout surprise. The secret is matching the right adhesive, prep, and removal technique to your exact wall type. Here is the complete playbook.
$25–$100+
Typical move-out wall damage charge
Billed per hole, patch, or repaint at inspection — some schools hold deposits against it.
16–20 lb
Max rating of modern removable strips
Extra-large picture strips now rival nails for mirrors and large frames — no hole required.
“Proper surface prep and respecting weight ratings eliminate nearly all adhesive wall damage.”
Key Insight · Research Brief$25+
Per nail hole at move-out
30sec
Firm press for a lasting bond
1hr
Wait before hanging anything
20lb
Heavy-duty XL strip rating
45°
Safe tape peel-off angle
Section 01 · The Toolkit
Six Damage-Free Solutions That Actually Work
Every method below keeps paint and drywall intact — the differences are weight capacity, wall compatibility, and permanence. Pick based on what you’re hanging and what your wall is made of.
The Default · 1–20 lb
Command-Style Picture Strips
Velcro-style paired strips for frames and canvases. Rated 1 to 16+ lb; new XL versions reach ~20 lb. Match the rating to your item — never exceed it.
Reusable · 0.5–5 lb
Adhesive Hooks
Wire hooks and sawtooth hangers for lights, keys, and small frames. Hooks are reusable with fresh replacement strips — the strip itself is the one-time part.
Posters · Ultra-light
Museum Putty
A pea-sized ball at each corner gives posters and prints a semi-permanent, adjustable hold that removes cleanly without residue or paint lift.
Collages · Decorative
Washi & Painter’s Tape
Low-tack and genuinely paint-safe. Distributes holding force along the edge — peel away at a 45° angle to avoid lifting paint or leaving residue.
Zero Wall Contact
Tension Rods & Leaning
Rods wedged between walls or furniture act as a makeshift rail. Leaning framed art on desks and dressers is the only 100% risk-free method there is.
Avoid · Paint Killer
Duct, Masking & Packing Tape
Designed for temporary jobs but notorious for sticky residue and peeled paint, especially on textured or delicate surfaces. Also skip the toothpaste-as-spackle hack.
Section 02 · Know Your Numbers
Weight Ratings vs. Your Wall Type
Ratings assume proper application on smooth, clean surfaces. Textured or porous walls cut real-world capacity dramatically — and poor prep, humidity, and freshly painted walls (let paint cure a week or more) cause most failures, not the product.
Heat matters: un-air-conditioned dorms in August weaken adhesive at move-in. Press long, wait the full hour, and keep loads conservative in hot, humid rooms.
Painted Drywall
The adhesive-friendly standard. Prep with isopropyl alcohol and respect ratings.
Smooth Plaster
Behaves like drywall if fully cured. Fresh paint needs a week or more to cure first.
Textured Walls
Uneven surfaces reduce adhesion — standard strips peel or fall. Use specialized hooks.
Cinder Block
Porous and rough. Go brick-rated adhesive hooks, tension rods, or skip the wall entirely.
Section 03 · Head-to-Head
Method Comparison at a Glance
Damage risk assumes correct application and removal. The highlighted column is the deciding factor for most dorm dwellers.
| Method | Holds | Best For | Damage Risk | Textured / Block | Removal |
|---|---|---|---|---|---|
| Picture strips | 1–20 lb | Frames, canvases, mirrors | ✓ Minimal | ✗ Poor grip | Stretch straight down |
| Adhesive hooks | 0.5–5 lb | Lights, lanyards, small art | ✓ Minimal | ✗ Poor grip | Stretch straight down |
| Museum putty | <1 lb | Posters, unframed prints | ✓ Minimal | ~ Spotty | Roll off, no residue |
| Washi tape | <0.5 lb | Photo collages, grids | ✓ Minimal | ~ Spotty | Peel at 45° |
| Brick-rated hooks | Up to 15 lb | Tapestries on cinder block | ~ Low | ✓ Built for it | Per manufacturer |
| Tension rod / leaning | Rod-rated | Heavy art, textiles | ✓ Zero | ✓ No wall contact | Just pick it up |
| Duct / masking tape | Varies | Nothing, in a dorm | ✗ High | ✗ Peels paint | Residue likely |
Section 04 · Technique Is Everything
The Five-Step Application Ritual
Adhesive failure is almost always user error — skipped prep, early loading, or bad removal. Follow the sequence and strips release cleanly at move-out.
Clean
Wipe the spot with isopropyl alcohol — never household cleaners, which leave residue.
Press
Apply the strip and press firmly against the wall for a full 30 seconds.
Wait
Let the adhesive build strength for at least one hour before loading any weight.
Hang
Mount your art within the strip’s weight rating — when in doubt, use two pairs.
Release
At move-out, stretch the tab slowly straight down along the wall — never outward.
↓
Removal Rule · Straight Down, Never Out
Pulling a strip outward tears paint and drywall paper. Stretching the tab straight down — like slowly lengthening a sticker — shears the adhesive cleanly off the surface. Same logic for tape: peel back at a low 45° angle, slow and steady.
Section 05 · The Decision Chain
From Bare Wall to Checkout-Proof Room
Every safe display follows the same logic: identify the surface, match the method, then let policy have the final word.
Identify the Wall
Drywall, plaster, textured, or cinder block — the surface chooses the method.
Weigh the Art
Match the item to a rated strip, putty, tape, or a no-contact alternative.
Prep & Apply
Alcohol wipe, 30-second press, one-hour wait. Technique beats product.
Hang & Enjoy
Gallery walls, photo grids, tapestries — maximalist decor, minimalist risk.
Pristine Checkout
Strips stretch off clean. No holes, no fees, deposit intact.
Before You Hang Anything
- Read your housing handbook — rules vary wildly between schools and even buildings.
- Ask your RA or housing office when a method isn’t explicitly listed.
- Let fresh paint cure at least a week before applying any adhesive.
- Use proper lightweight spackle and matching paint for any real repairs.
Commonly Restricted Items
- Tapestries and fabric wall hangings — banned at some schools under fire codes.
- Hot glue on cinder block — a popular hack, but it can violate housing policy.
- Peel-and-stick wallpaper — approval depends entirely on your campus.
- Nails, screws, and tacks — prohibited by most housing contracts outright.
Why Most Dorm Damage Fees Come From Wall Holes — And How To Avoid Them
Damage fees often come from nails, screws, or tape that peel paint or drywall. Move-out inspections can catch even tiny holes, costing you $25 to $100+ for repairs. To keep walls pristine, understanding dorm wall types helps.
Most dorm walls are painted drywall or cinder block, each behaving differently with adhesives. For drywall, proper prep and weight limits matter. For textured or cinder block, you need specialized hooks or alternative hanging methods.
For example, using a heavy nail to hang a large poster might seem simple, but if the wall is textured or if the nail is too large, it can cause cracking or peeling over time. Conversely, a small command hook rated for lightweight items, if applied incorrectly, might fall and damage the wall or your art. Recognizing these differences means choosing the right solution for your wall type and understanding the trade-offs—such as durability versus damage risk.
As an affiliate, we earn on qualifying purchases.
The Best Damage-Free Solutions: Adhesive Strips and Hooks That Really Work
Adhesive strips like Command are your go-to for hanging art without damage. Rated from 1 to 16+ pounds, they handle everything from lightweight posters to small mirrors. Proper application and weight management are key to success.
For example, if you hang a small framed photo on a dorm wall, using a command strip rated for 3 pounds is usually sufficient. But if you attempt to hang a heavier mirror or multiple items on the same strip, the adhesive may fail, causing damage or falling. To avoid this, always match the weight of your item to the strip’s rating and consider the wall surface—rough or textured surfaces may require different types of hooks or additional prep.
Proper use involves cleaning the wall with isopropyl alcohol, pressing the strips firmly, and waiting at least an hour before hanging your item. When removing, pull the strip straight down slowly. Think of it like removing a sticker—pulling outward can tear paint or drywall, but pulling straight down gently releases the adhesive cleanly, preserving your wall’s integrity and avoiding damage.
removable command strips for wall art
As an affiliate, we earn on qualifying purchases.
As an affiliate, we earn on qualifying purchases.
How to Use Putty and Tape for Lightweight Wall Art (And What Not To Do)
For lightweight posters or photos, museum putty and low-tack tapes are your friends. They hold without damaging paint or plaster. Washi tape or painter’s tape are gentle options that won’t peel paint if removed carefully.
Using museum putty allows you to secure items at the corners without risking wall damage. This is especially important because it provides a semi-permanent hold that can be easily adjusted or removed without leaving residue or damaging the surface. Similarly, washi tape distributes the holding force evenly along edges, reducing the likelihood of paint peel or surface damage. When you peel it away, doing so at a 45-degree angle minimizes residue and prevents tearing or lifting paint. These methods are ideal for delicate or textured surfaces where traditional adhesives might cause more harm, and they provide an easy, damage-free way to personalize your space.
However, avoid regular duct or masking tape, especially for long-term use. These tapes are designed for temporary purposes but often leave sticky residues or peel paint when removed, especially on textured or delicate surfaces. Think of it like using painter’s tape on delicate wallpaper—careful application and removal matter to keep your walls pristine.
As an affiliate, we earn on qualifying purchases.
Tackling Textured and Cinder Block Walls: Your Best Options
Standard adhesive strips struggle with textured surfaces and cinder block. They tend to peel or fall off because these surfaces have uneven textures or porous materials that reduce adhesion. For these surfaces, you need specialized hooks or creative solutions that can handle the rough surface or avoid it altogether.
For instance, if you want to hang a tapestry on a cinder block wall, using brick-specific adhesive hooks rated for heavier weight can provide a secure hold without damaging the wall. Alternatively, tension rods placed between two walls or furniture allow you to hang art without any adhesive contact—think of it like creating a makeshift curtain rod for your artwork. Leaning art against the wall or placing it on furniture is another effective method, especially if you want to avoid any wall contact altogether. These options require understanding the trade-off: they may be less permanent but offer zero damage risk, which is ideal for dorms with strict policies.
It’s important to recognize that these alternative methods often involve a trade-off between permanence and safety. Tension rods and leaning art are not as secure as wall-mounted solutions but are excellent for avoiding damage and complying with dorm rules. They also allow for easy rearrangement, giving you flexibility without risking penalties or wall damage. Choosing the right method depends on your priorities—whether you prefer a more stable display or a damage-free, flexible setup.
reusable tension rods for wall decor
As an affiliate, we earn on qualifying purchases.
As an affiliate, we earn on qualifying purchases.
Creative Ways to Decorate Without Any Adhesives
No damage? No problem. There are many ways to personalize your space without sticking, nailing, or drilling. These methods are simple, safe, and often more flexible, allowing you to change your decor easily without risking wall damage.
For example, leaning a framed photo or art print against your desk or dresser creates a versatile display that can be moved or replaced without leaving marks. Using a wire grid wall or cork board on a stand or easel offers a stylish, damage-free way to showcase your favorite items. Hanging string lights with over-the-door hooks or command hooks on furniture is another creative solution that avoids wall contact entirely. Installing a freestanding photo ledge on your furniture not only provides a decorative display but also offers the flexibility to change your arrangement whenever you like—no tools, no damage, just effortless personalization. These options empower you to customize your space while respecting dorm policies and preserving your walls’ integrity.
Double-Check Your Dorm’s Rules Before You Decorate
Always read your housing handbook first. Some dorms ban tapestries, fabric wall hangings, or certain adhesives, regardless of damage risk. Rules vary wildly — what’s allowed in one dorm might be forbidden in another.
For example, a dorm might prohibit fabric wall hangings due to fire safety codes, but allow lightweight posters with command hooks. When in doubt, ask your RA or housing office. Better safe than sorry — and you’ll avoid fines or having to redo your decor at checkout. Understanding and respecting these policies can save you time, money, and stress, ensuring your decorating efforts stay within the rules and your walls remain undamaged.
New Trends and Tools Making Damage-Free Dorm Decor Easier
Innovations are making damage-free decorating simpler than ever. Heavy-duty removable strips now hold up to 20 lbs, enough for large mirrors and framed art. Repositionable strips allow perfect leveling without reapplying. For example, you can hang a large mirror on your door or wall without nails, and reposition it easily if needed.
Peel-and-stick wall decals, faux headboard decals, and magnetic poster hangers are popular, stylish, and dorm-friendly. Magnetic rails and wooden frame rails are reusable options that don’t require adhesives. These tools combine style with practicality, making decorating both easier and safer than ever before.
Always verify dorm safety policies before using new tools—some schools restrict fabric or tapestry use for safety reasons, even if damage isn’t an issue. For example, a decorative fabric wall hanging might look great but could be prohibited if it doesn’t meet fire safety standards. Checking with your housing office ensures your decor remains compliant and safe, avoiding potential issues later.
Frequently Asked Questions
Do Command strips actually damage walls or peel paint?
When used correctly, Command strips typically don’t damage walls or peel paint. Proper prep, weight adherence, and gentle removal are key. Avoid pulling outward; instead, pull straight down to prevent damage.How do I remove adhesive strips without peeling paint?
Pull the strip slowly and steadily straight down along the wall. Do not yank outward or at an angle. Warming the strip slightly with a hairdryer can soften the adhesive for easier removal.What works on cinder block walls?
Cinder block walls require specialized hooks or mounting methods. Try brick-specific adhesive hooks, tension rods, or lean art against the wall. Hot glue can work temporarily but check your housing rules first.How much weight can adhesive strips/hooks really hold?
Most command strips range from 1 to 16+ pounds, depending on the product. Heavy-duty versions can hold up to 20 pounds, but always verify surface smoothness and follow weight limits for safety.Are tapestries allowed in dorms? How do I hang one without nails?
Many dorms restrict fabric wall coverings due to fire codes. If allowed, use command hooks or tension rods to hang tapestries without nails. Always double-check your housing rules first.Conclusion
Personalizing your dorm doesn’t have to mean risking damage fees or wall repairs. With the right tools and techniques, you can create a space that feels like home — without the damage. Think beyond nails and tape; your walls will thank you, and so will your wallet.
Imagine walking out of your dorm knowing your artwork is hanging proudly, and your walls look untouched. That’s the real win. So go ahead — hang your style, damage-free and stress-free.